In one sentence it is “Idea sharing tool between designers”.
It is a simple method which can be used during the designing process by designers to express or communicate their idea among colleague, friends and team members.
To understand what storyboarding has to do with designing user experience? we have to ask a few questions like:
- Why?
- What?
- How?
By answering all these questions I will tell you about storyboarding and its use in interaction designing.
1. Why Storyboarding in UX design?

Image 1: Stick picture.
People can understand better by seeing rather than by reading the whole passage. And for expressing an idea through writing require too many lines and sentences to describe small action or emotion. So to reduce designer effort and time wastage, we can represent these action by making stick figures and representing emotion by icons above stick figures as shown in Image 1. And small annotations will help to get the whole idea of what the designer wants to share with this story.
From image 1, it is clear that this person wants to fly towards another building because there is someone whom he likes.
2. What are storyboard and its use in UX design?

Image 2: Walt Disney production storyboard.
What is storyboarding? According to Wikipedia, a storyboard is a graphic organizer in the form of illustrations or image displayed in sequence for the purpose of pre-visualizing a motion picture, animation, motion graphics or interactive media sequence.
Today’s storyboarding techniques were first developed and used by Walt Disney Productions (image 2) to make animated cartoons and movies.
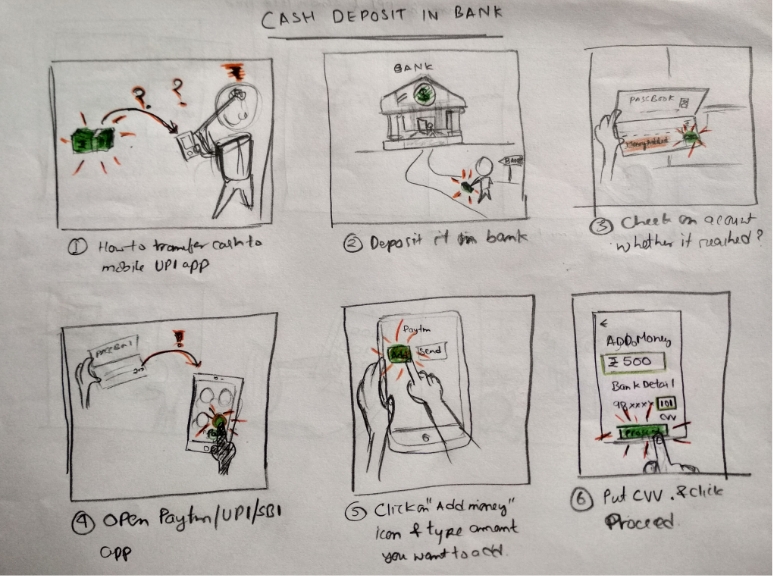
Image 3: Process of Cash deposit in Bank.
But the role of storyboarding in UX designing is different, in interaction design it is used during developing ( or idea sharing) phase of the product, where one designer expresses his idea with their team members by using storyboarding because it is the easiest and most efficient method.
From image 3, you can get the idea of what is going on and also give the brief of the workflo
3. Want to Make your own storyboard but how?

image 5: Storyboard of a person passing by the shop and gets the discount.
Remember!
“You are not an animator, you are designer.” so use storyboarding as a problem describing tool.
Do not get deep into storyboarding technique, learn that much in which you can tell your story or share your idea.
Some basic knowledge before!
Types of Shots.
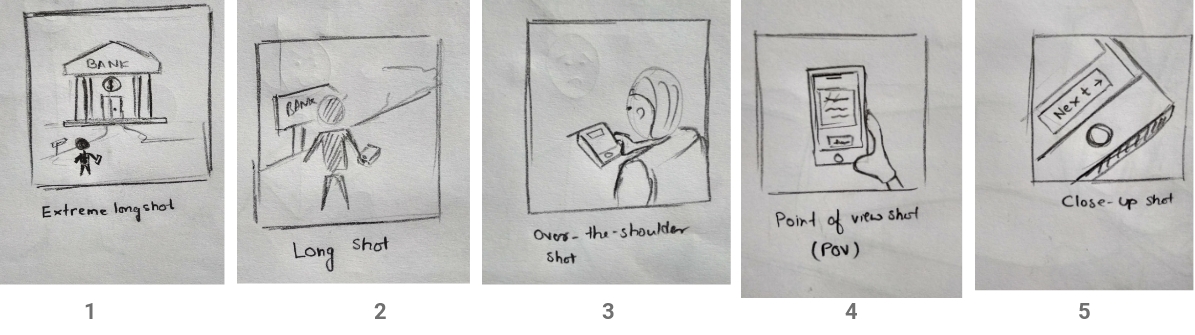
Image 6: Different types of Shots.
1-Extra long shot – This shot is used to introduce the viewer to the location.
2-Long shot.- The transition from location ie, an extra long shot to short shots or over-the-shoulder shots.
3- Over-the-shoulder shot – Shows action taken by the user.
4-Point-of-view shot – What your eyes see?
5-Close-up shot – Concentrate on specific button or area of interest
Types of stick figures.

Image 7: Stick figures.
Emotion representation
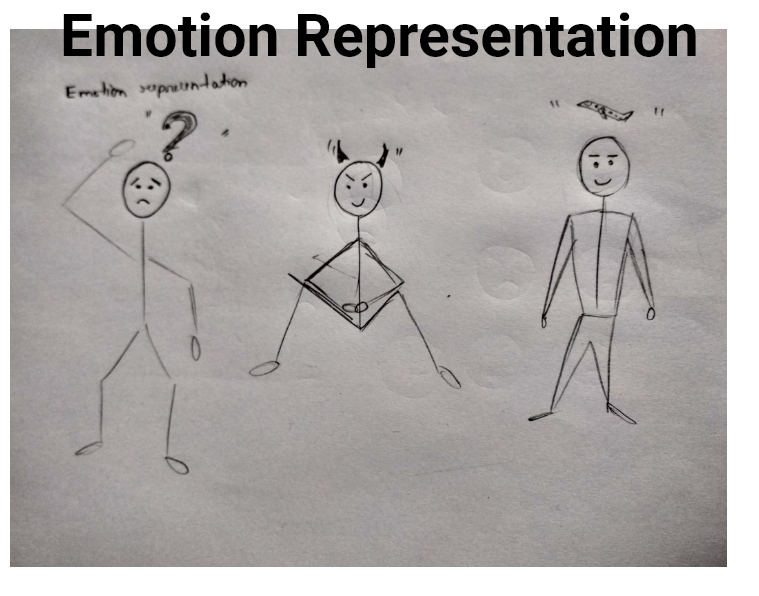
Image 8: Emotion representation
Movement in lines.

Image 9: Normal and consistent lines.
Giving minute variation in position, alignment and size of the line make it more interesting, eye-catchy, attention seeker and fill life in it.
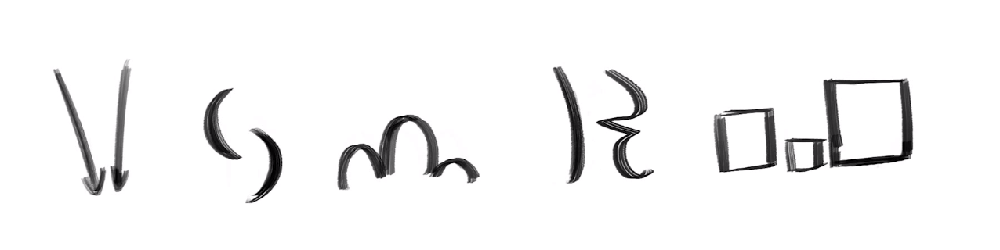
Image 10: Funky lines.
Few steps which I follow to make storyboard are:
- Outline frames first.
“Don’t get ready, get started” this practice is best followed when you started by drawing not by thinking what to draw. It’s very confusing from where to start so start by just drawing frames, this is the answer to why frames first? But after seeing the image question arises is Why 5 frames?

Image 11: 5-Frames outlined.
2. Develop the storyline.
Writing storyline before helps to sketch later. During developing storyline ask these questions to yourself:
- Where does interaction take place?
- What is the problem?
- What is the task people are trying to do?
- Which device used by users during interaction?

Image 12: Storyline before sketching.
3. Sketch establishing shot.
The first frame must introduce the viewer to the user and his surrounding. As you move further frames follow the buildup, climax (Most important frame) and end.
This image 13 explains Why 5 frames? as five frames are not more to work on and not less in which story will not be clear.
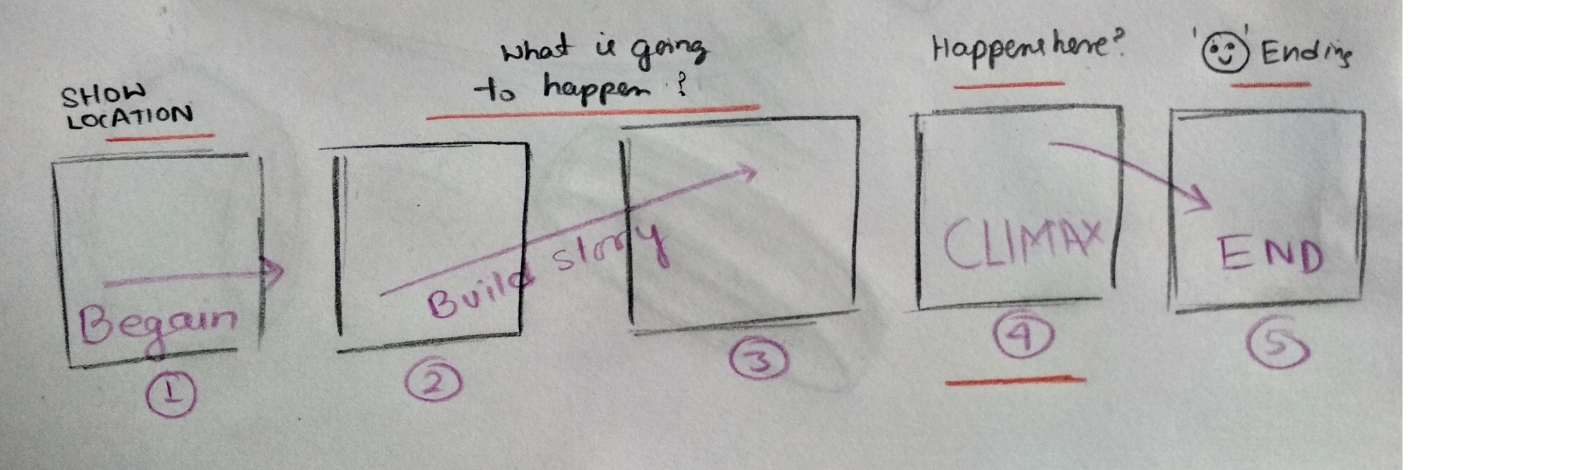
Image 13: What is needed in each frame.
4. Time to sketch with appropriate camera shots
Selecting an appropriate shot like Extra-long-shot is always used in the first frame, as to tell the viewer about Where this interaction takes place?

Image 14: Sketch with appropriate shots.
5. Emphasize action and motions.
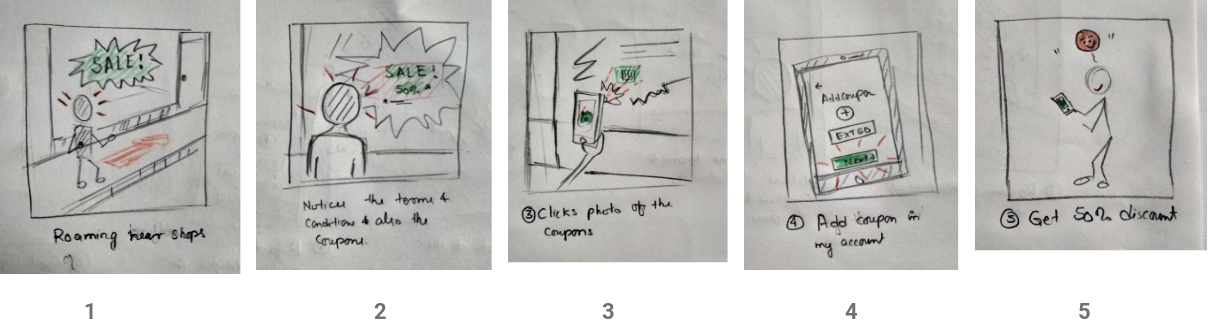
Image 15: Colour added.
Best way to emphasize is by using colors and adding movement in the line.
6. Demonstrate to other and iterate.
Share this with few of your colleagues and ask whether they get a clear idea about what is going on.
References.
- http://www.dsource.in
- Sketching User Experiences: The Workbook by Saul Greenberg, Sheelagh Carpendale, Nicolai Marquardt, Bill Buxton.
- http://cartoonconceptdesign.blogspot.com/2014/11/vintage-disney-animation-storyboard.html
- https://www.deviantart.com/shaktiditya/art/2-783442991
- https://www.deviantart.com/shaktiditya


0 Comments